terça-feira, 7 de outubro de 2014

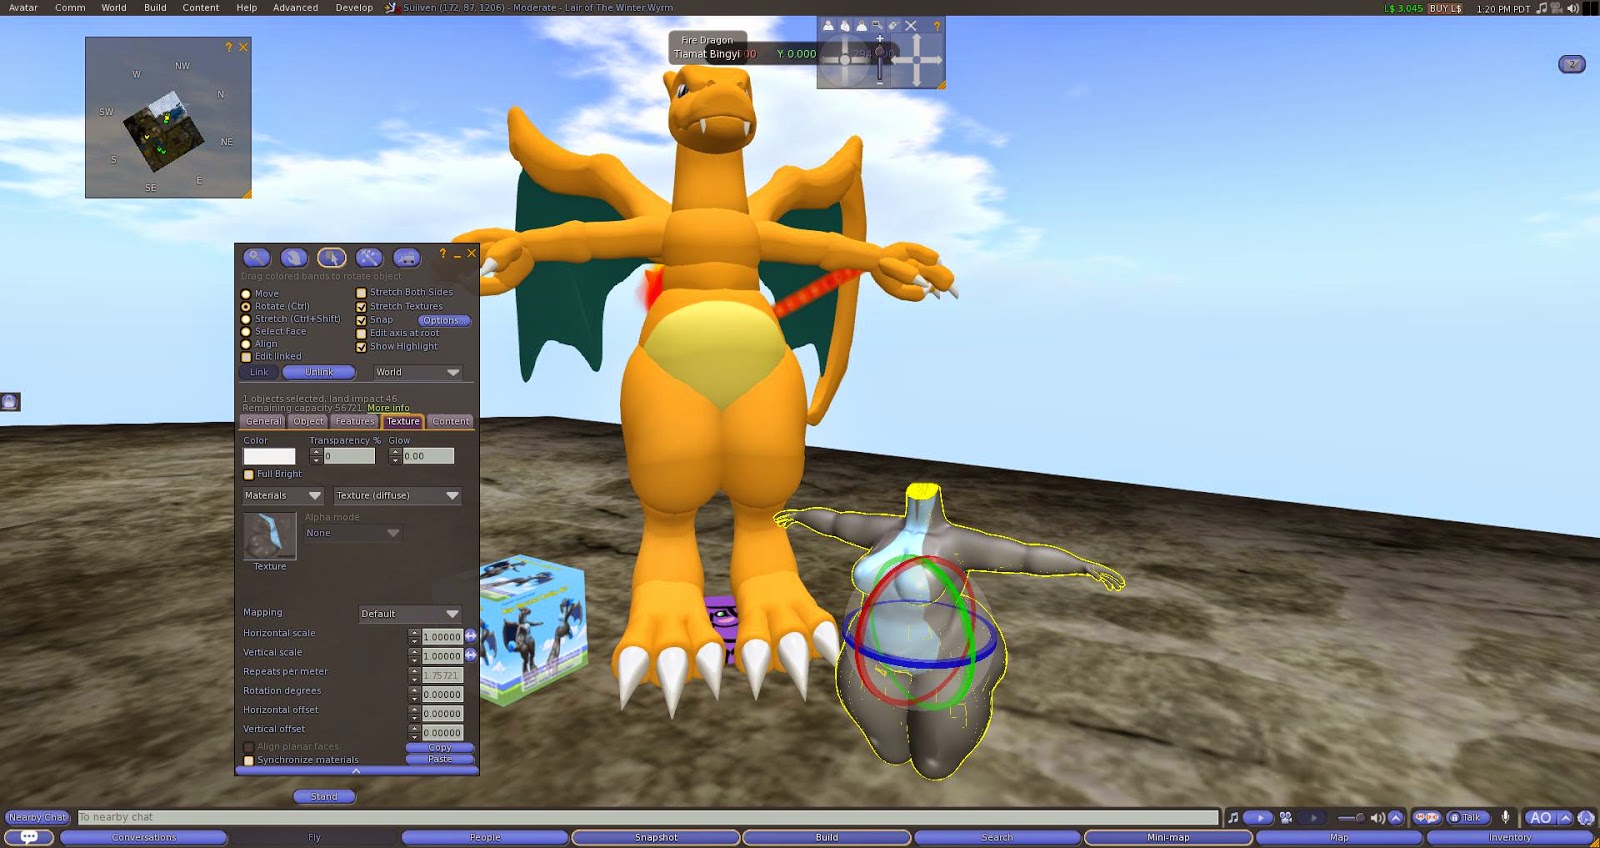
Enter Mega charizard mod

Time to work again!! Woot
1.Modding Mega charizard is pretty much the same as the regular Charizard, except for the script used to change the flames color from scripted tail.
You re going to need:  Ravenoid´s Chubby mesh body. (either work, small or big)
                                    Carolzilla´s charizard 2.0 avatar ( dark or regular charizard)

1. Modelar o Mega charizard é bem semelhante a modelar o charizard normal exceto pelos nomes das texturas e do script para mudar a chama da cauda scriptada de cor.
Você precisará: Ravenoid´s Chubby mesh body. (either work, small or big)
                          Carolzilla´s charizard 2.0 avatar ( dark or regular charizard)

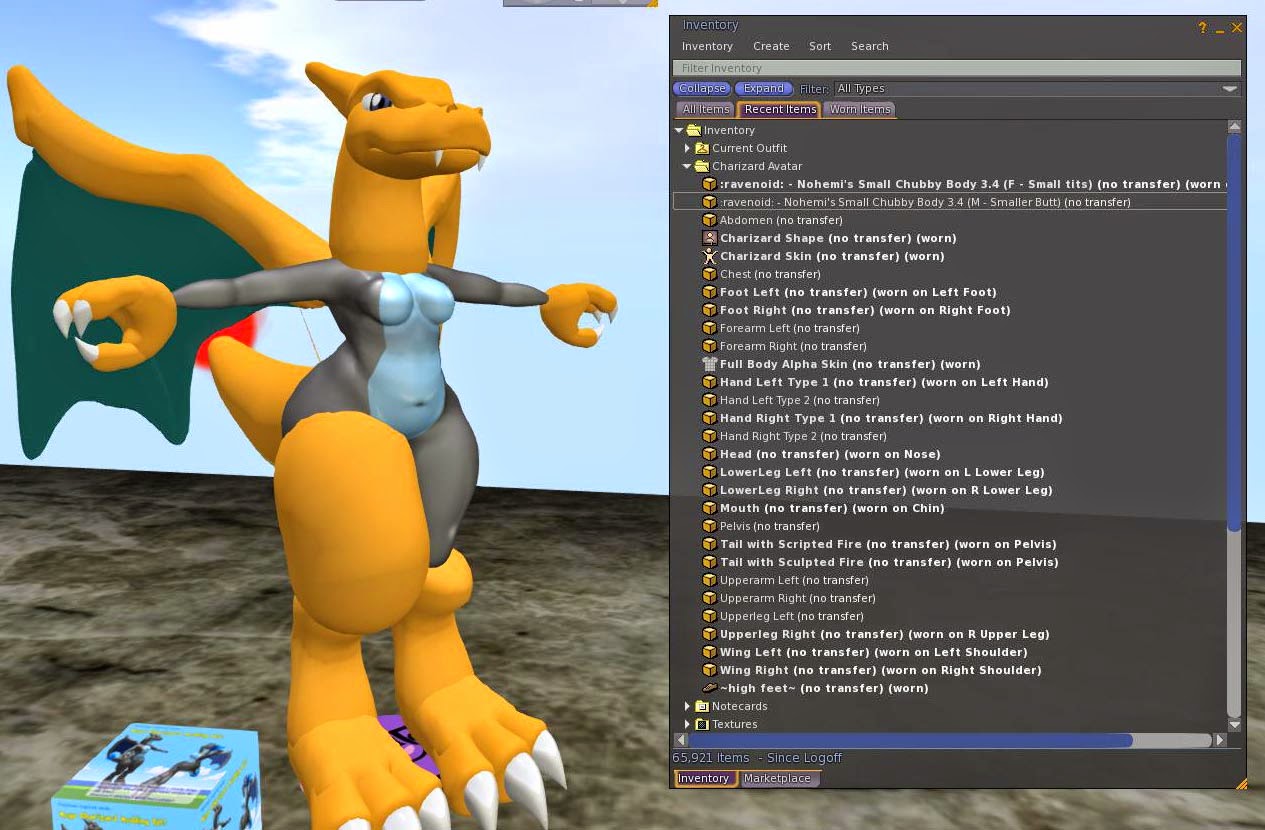
Open a copy of your avatar , textures box and the mesh body. organize them into one folder. if you´re not going to use all the parts you can delete them.

Abra uma copia da caixa do seu avatar, texturas e o corpo mesh. Organize tudo em um folder. As partes que não for usar, você pode deletar.
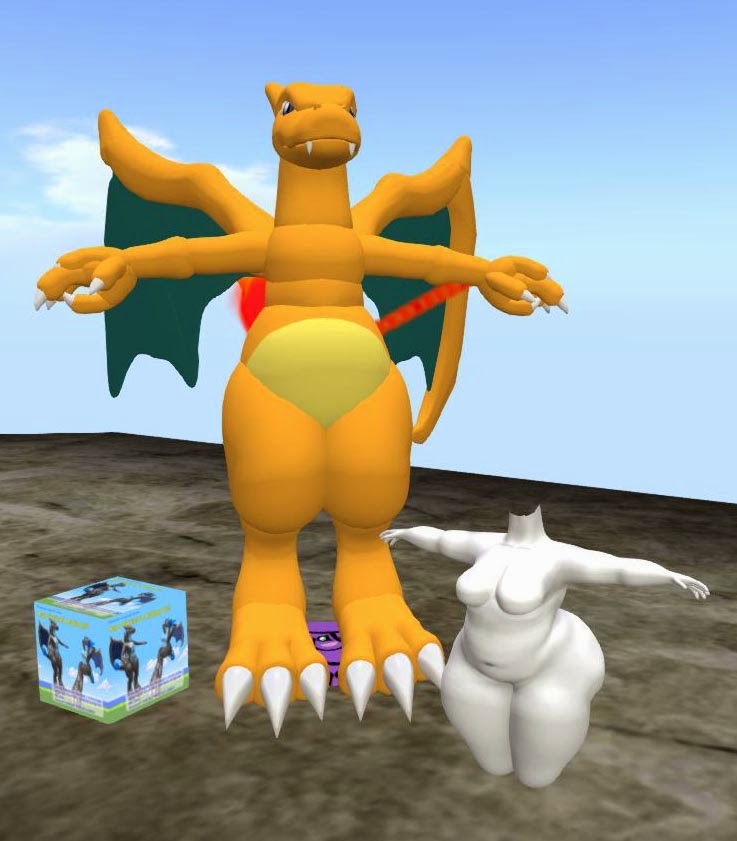
open and get the parts to mod.

use darkchar_body to texturize your ravenoid´s mesh body


detach the parts you wont use
Wear the avatar... I am using the small body for my mod..you can use the big male or female to work. the process and textures are the same.. just the values while resizing will change.

Vista o avatar, Estou usando o corpo pequeno para meu mod. Você pode usar o grande, masculino ou feminino, o processo e texturas são os mesmos. Apenas os valores irão mudar quando tiver que redimensionar.

2. Textures!
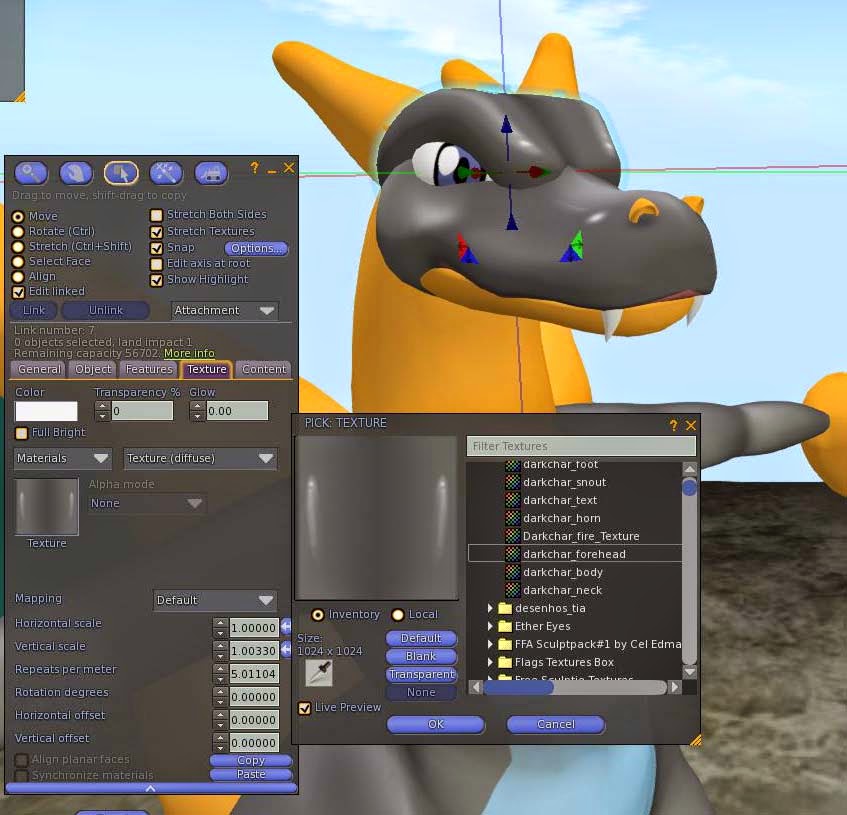
Check the pictures for the correct texture name and place: You may need to edit - using linked parts active.

Olhe as figuras para o nome correto das texturas e lugar. você deverá usar o edição com partes linkadas .
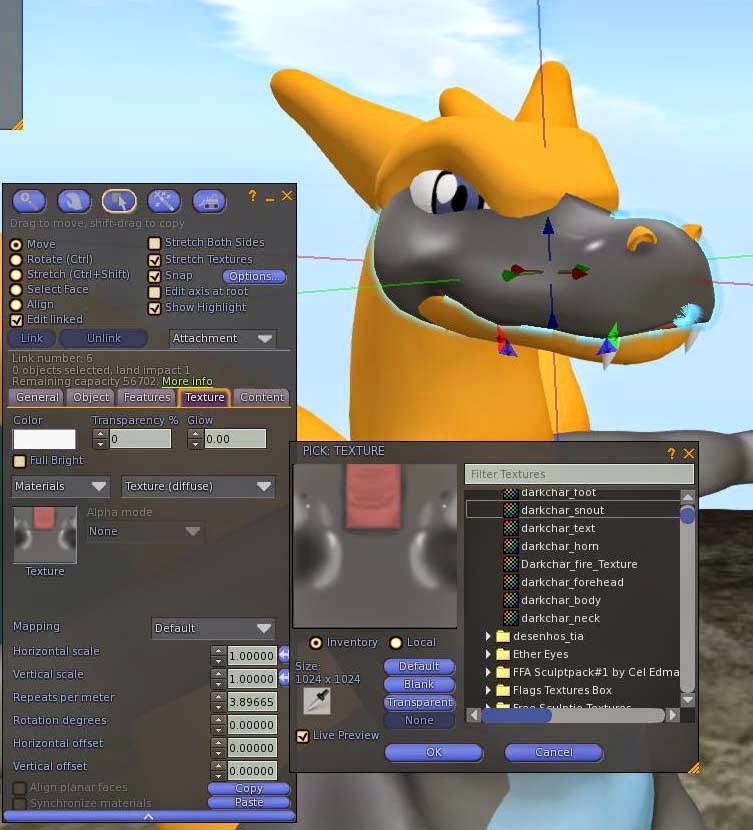
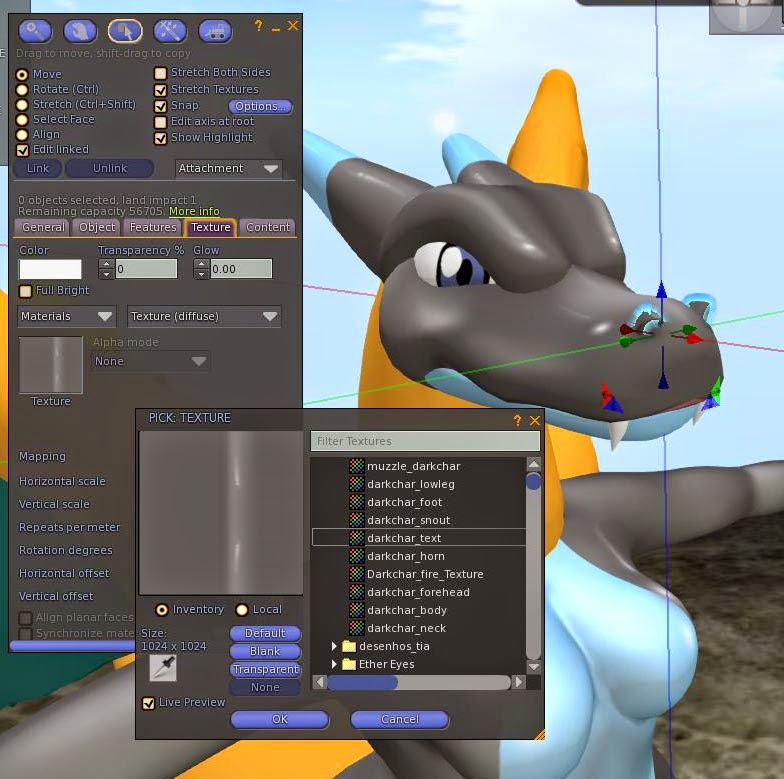
select upper muzzle and use Darkchar_snout texture

darkchar_forehead texture for head;

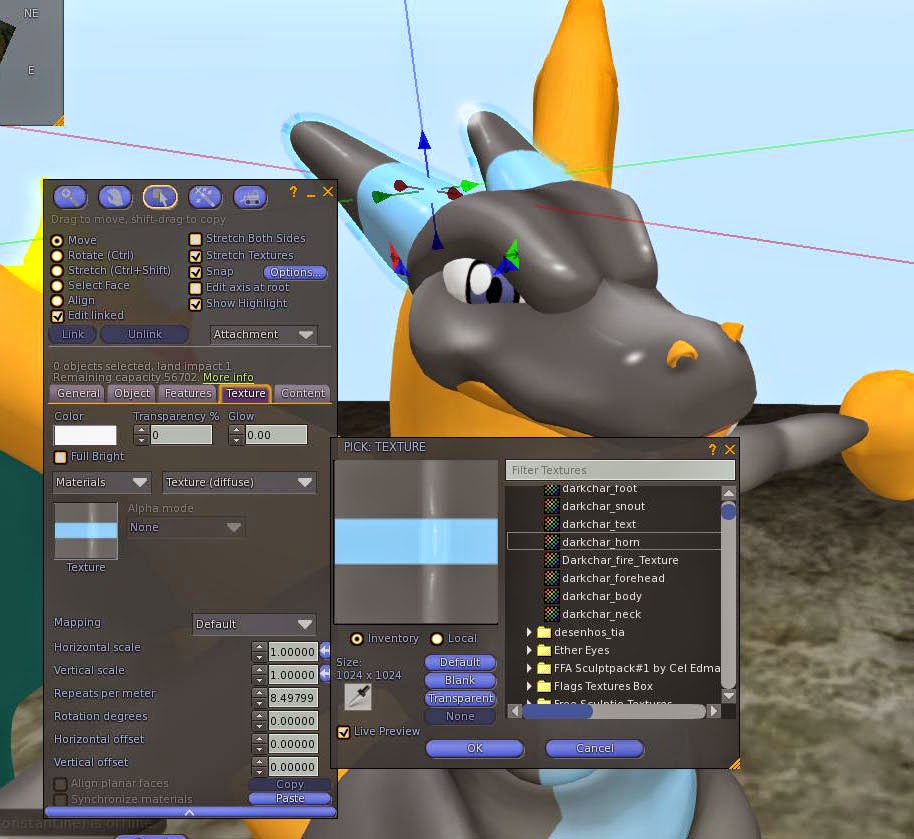
darkchar_horns for horns...

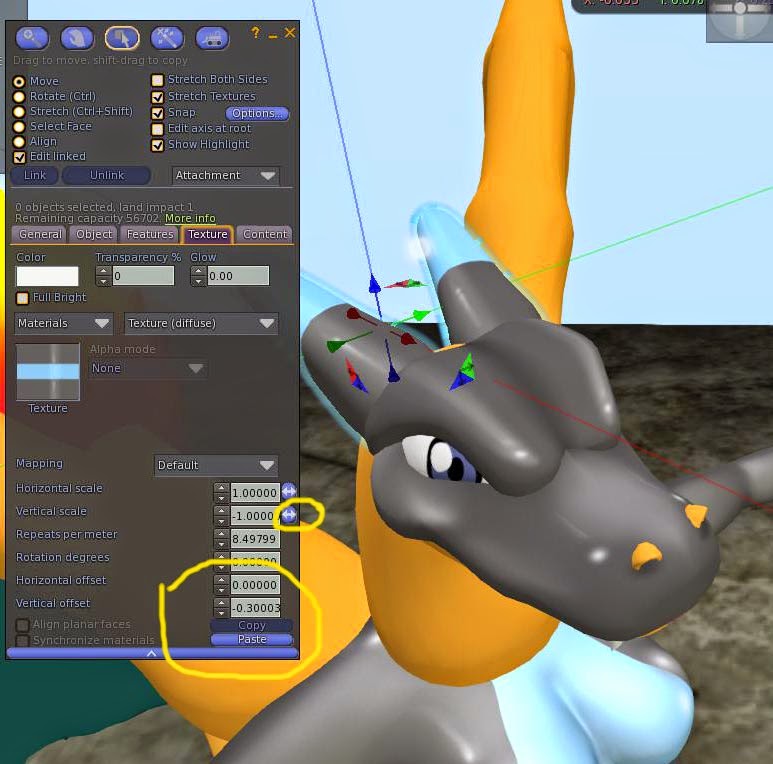
change the values to get the blue part into the correct position.
after applying texture, change the vertical scale orientation using the double sided arrow and vertical offset to move blue part into the correct position.

depois de aplicar a textura, mude a orientação do vertical scale usando a setinha dupla e verticall offset para mover a parte azul para o local correto.

apply muzzle_darkchar for muzzle piece

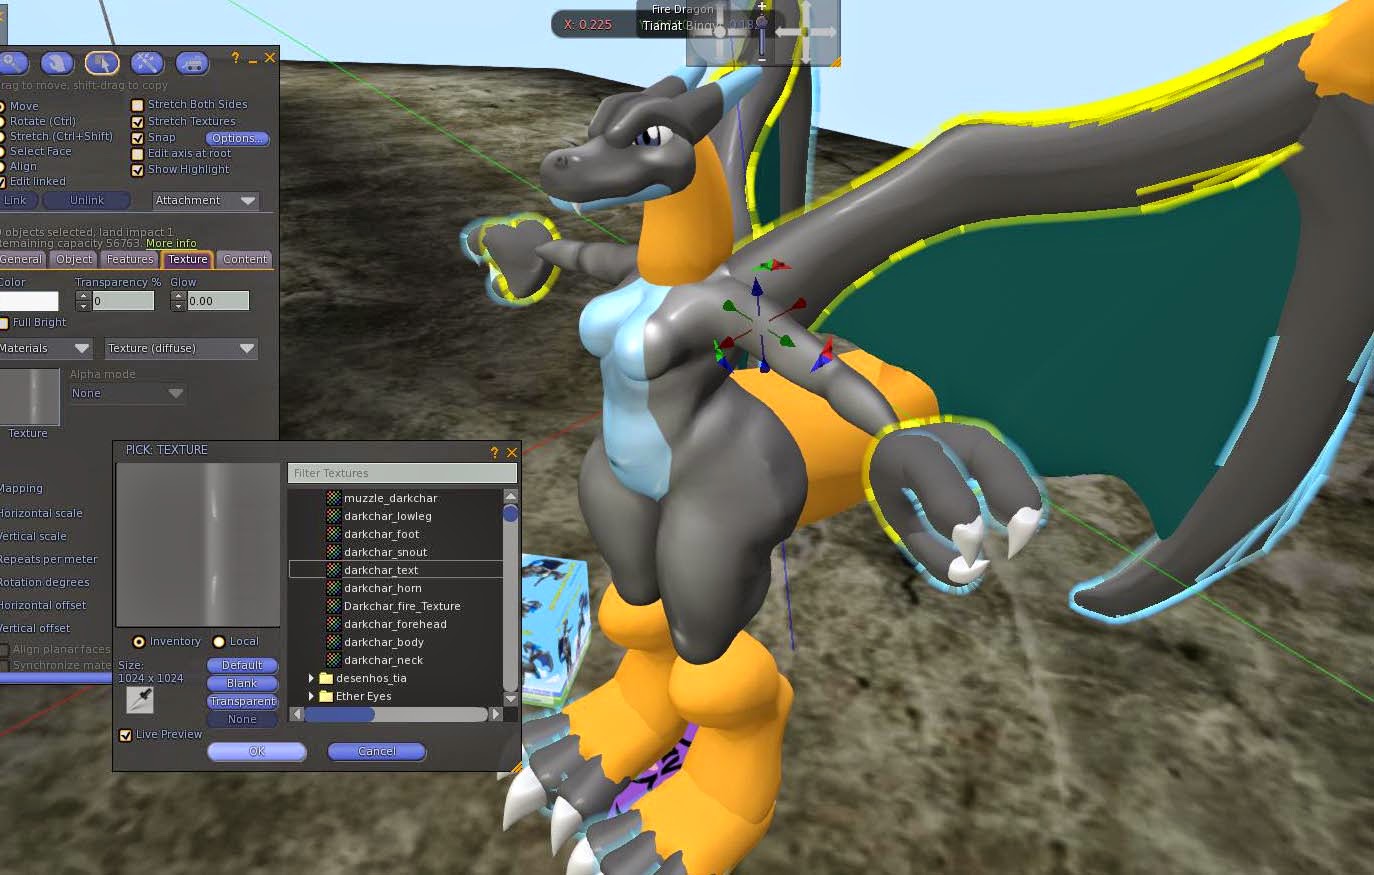
snouts, wings, fingers, toes  use Darkchar_text  texture.
For fingers, toes, hands, nostrils, wings structure, use darkchar_text for texture.. you can change the values to get texture shininess effect placed diferently.
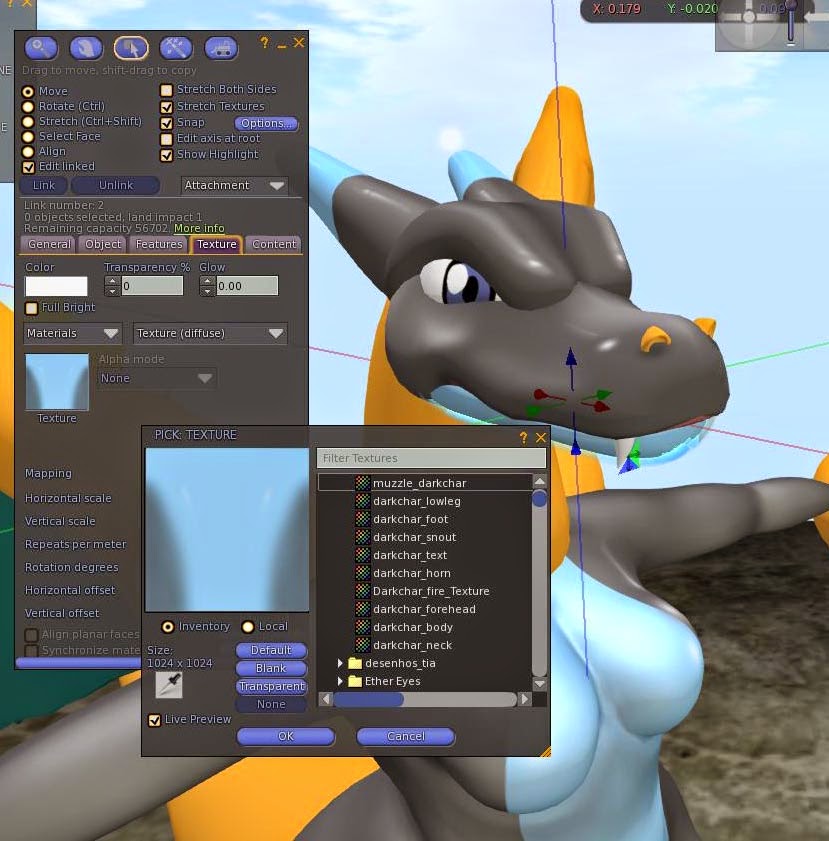
Para dedos, mãos, narinas, estrutura das asas, use darkchar_text como textura.. vc pode mudar os valores das texturas para obter um melhor efeito visual dos brilhos da textura.

3. body textures
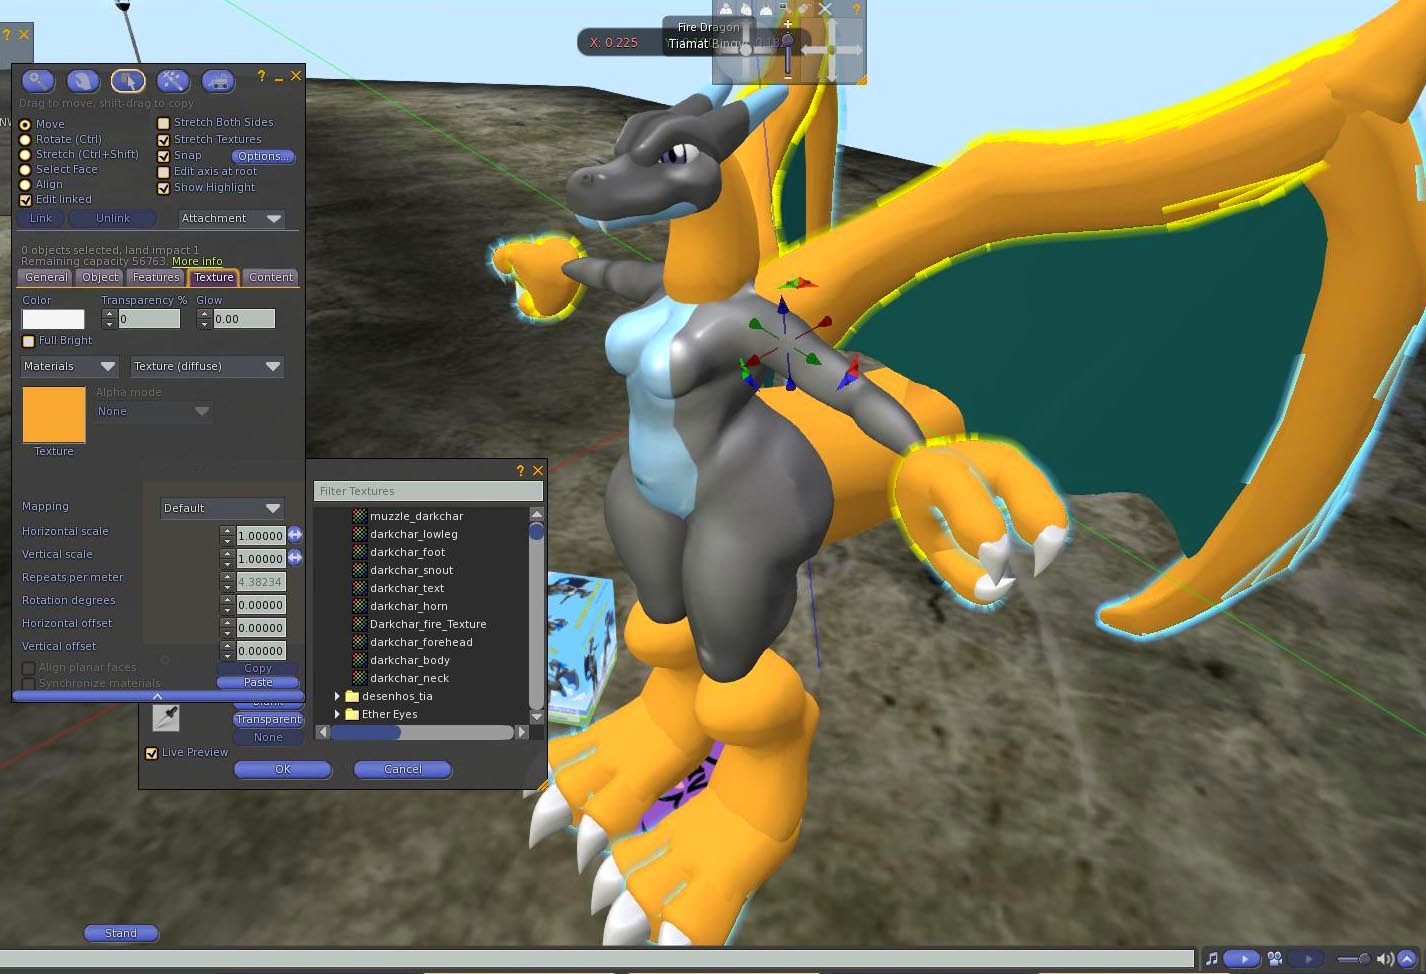
for a faster job, select multiple parts.

darkchar_texture for them.

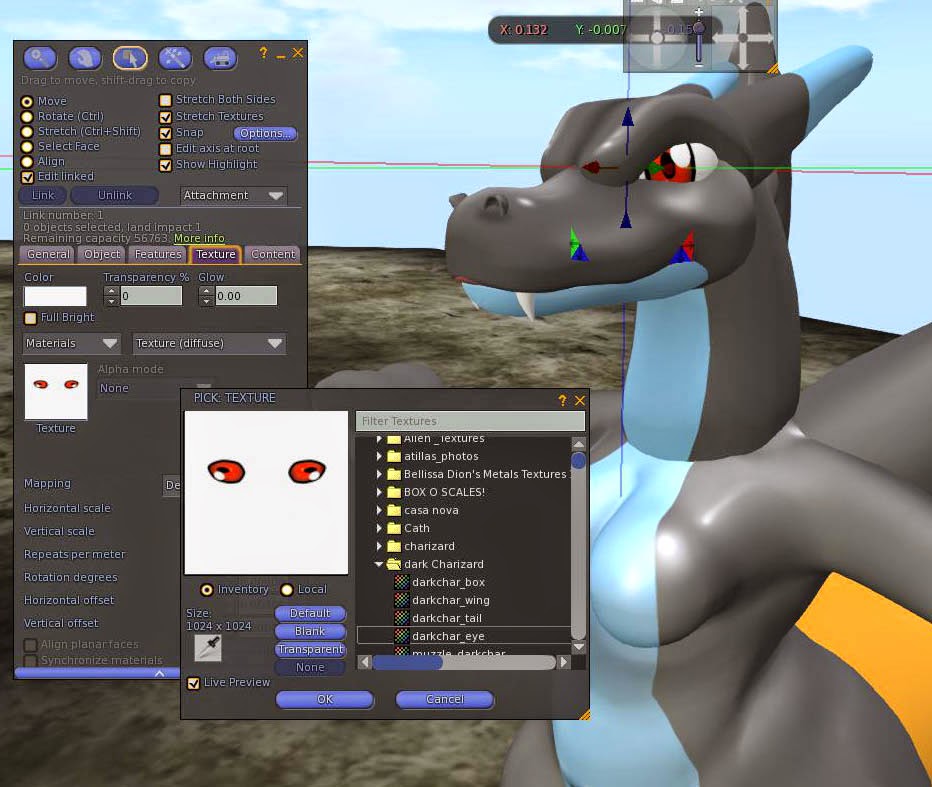
darkchar_neck for neck, anddarkchar_eyes for eyes.

resizing job
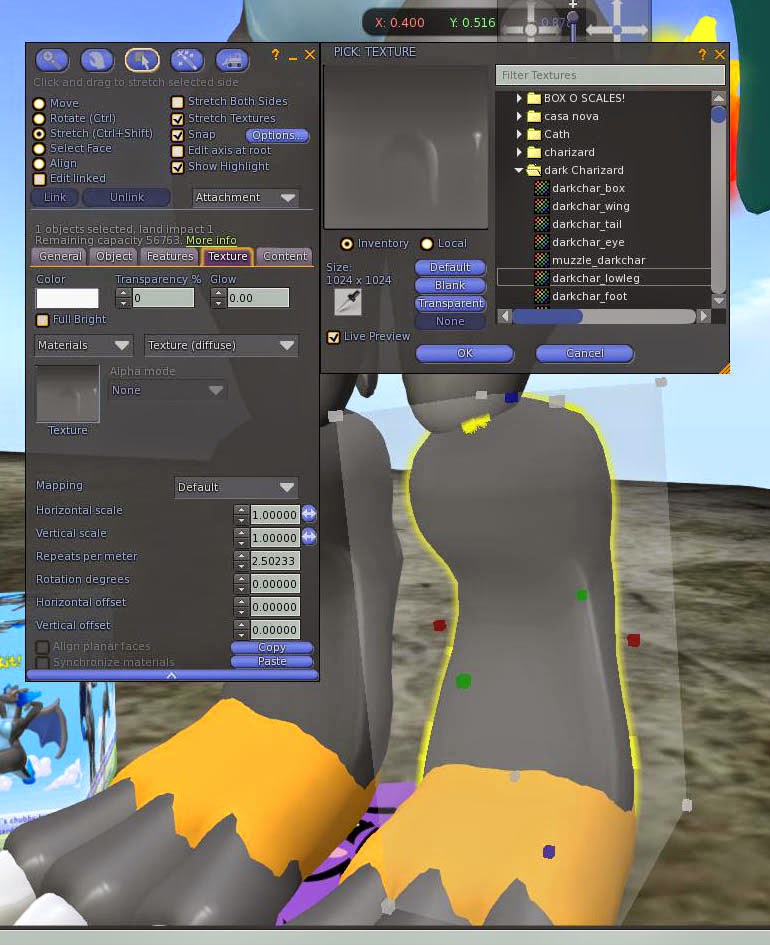
texture the lower leg and resize it the way you feel better. copy the values and paste into the other lower leg to get them with the same size and shape.

Texturize a canela e a redimensione do jeito que desejar, copie os valores e cole na outra perna para que fiquem iguais


 4. Tail and script.

Now its time... Good building/editing skills are required. (dificult lvl - medium)
Agora é hora. Boas habilidades de edição e construção são necessarias.
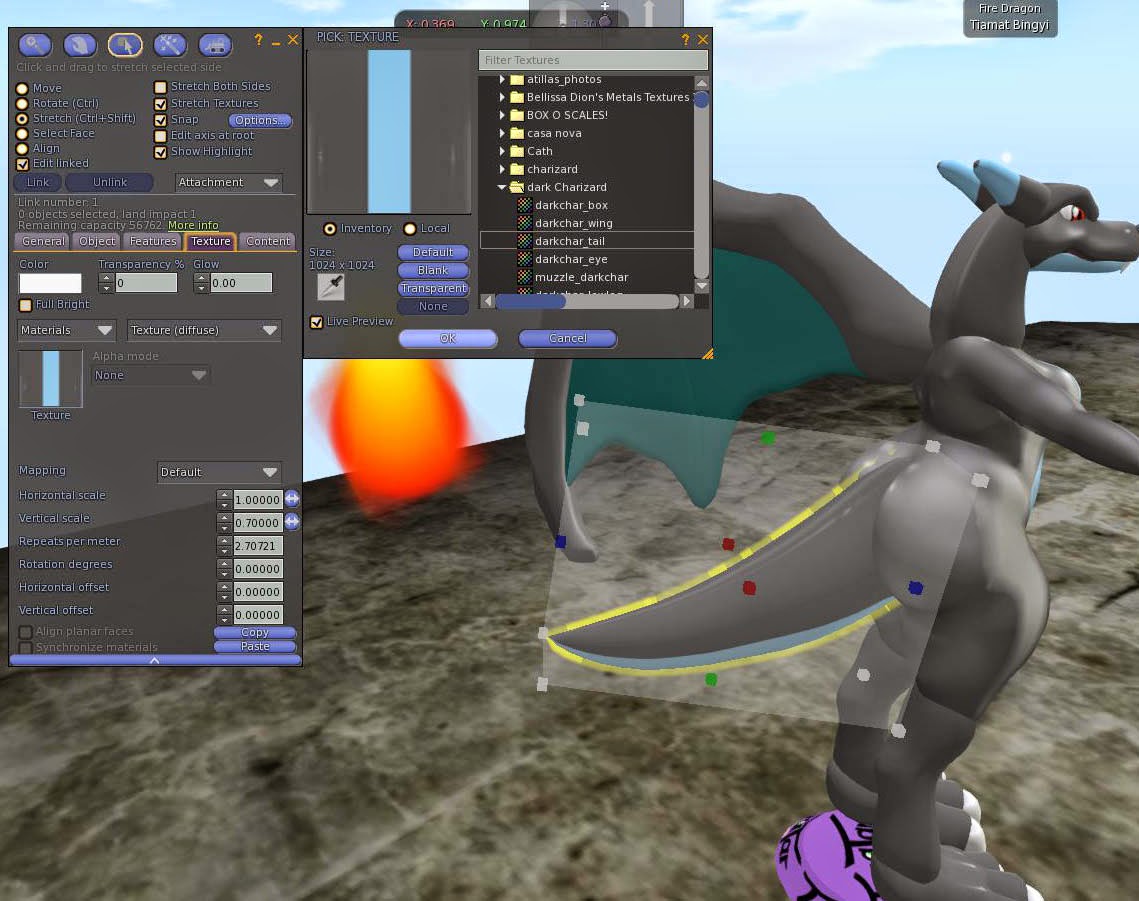
texturize it - darkchar_tail
Texturize and rezise your tail. edit linked parts. the scripted prim wont allow you to shrink your tail.
than, using ctrl+alt+T to see invisible objects edit linked parts to move the flame script prim into to correct position.

Texturize e redimensione sua cauda. Edite partes linkadas para porque o prim da chama não permitirá que vc encolha a cauda muito mais. Com ctrl+Alt+t vc pode ver e mover o prim da chama.

select the script prim and move into the correct position.

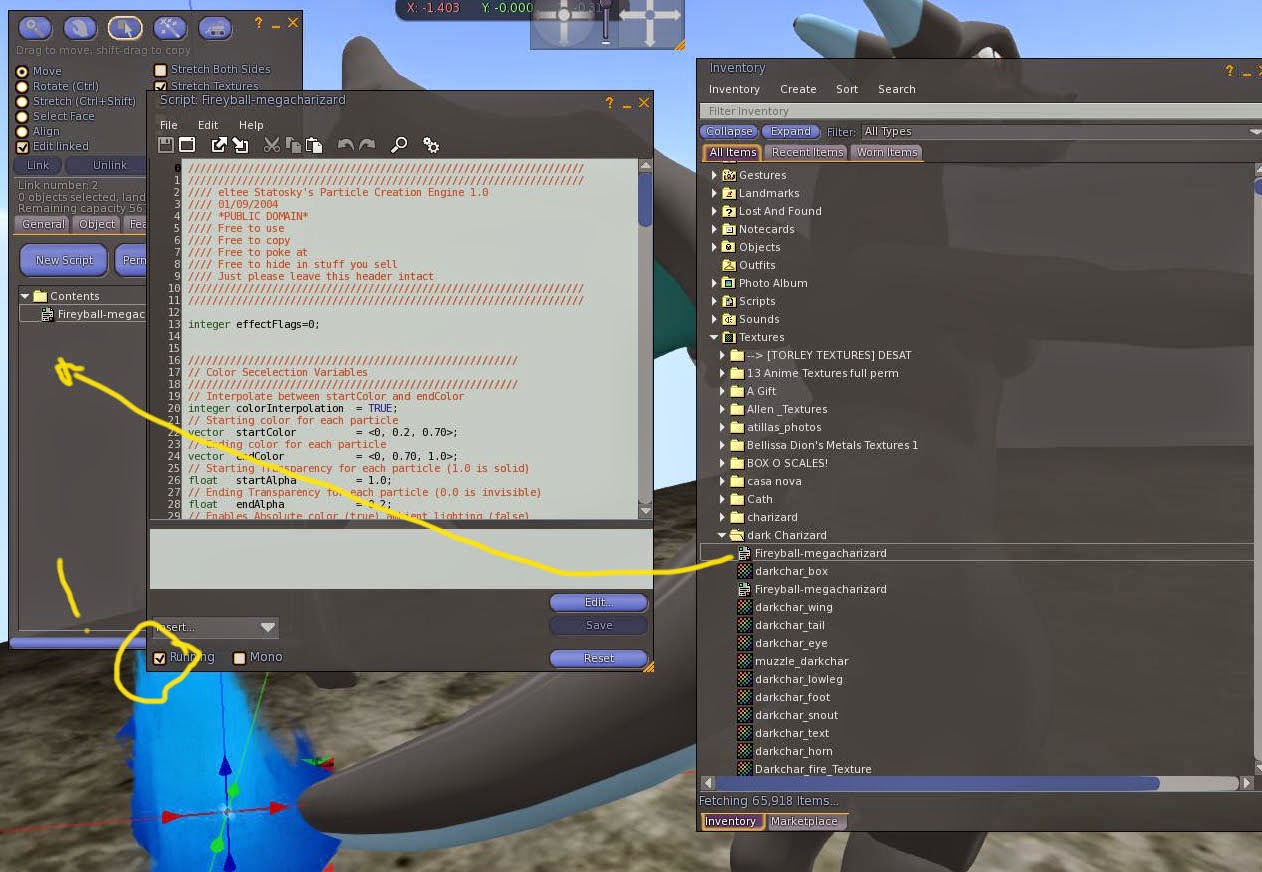
add the script fireball -megacharizard and delete the old one.

Open yuor mod kit folder and drag the fireball-megacharizard script into the flame prim, and delete the old script.. the flame is going to change color. remember to set the script to running if it doesnt work.

Abra a sua parte de modelagem e arraste o script fireball-megacharizard para o prim das chamas, e apague o script antigo. A chama mudará de cor. Lembre-se de colocar o script funcionando, se não funcionar.
set to running if needed

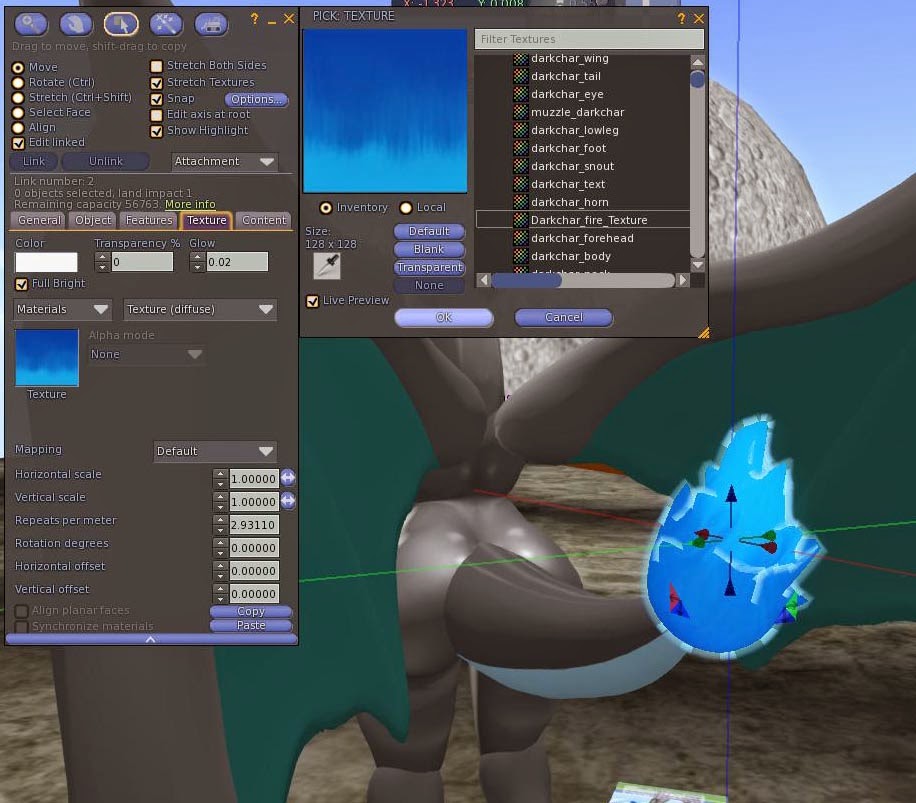
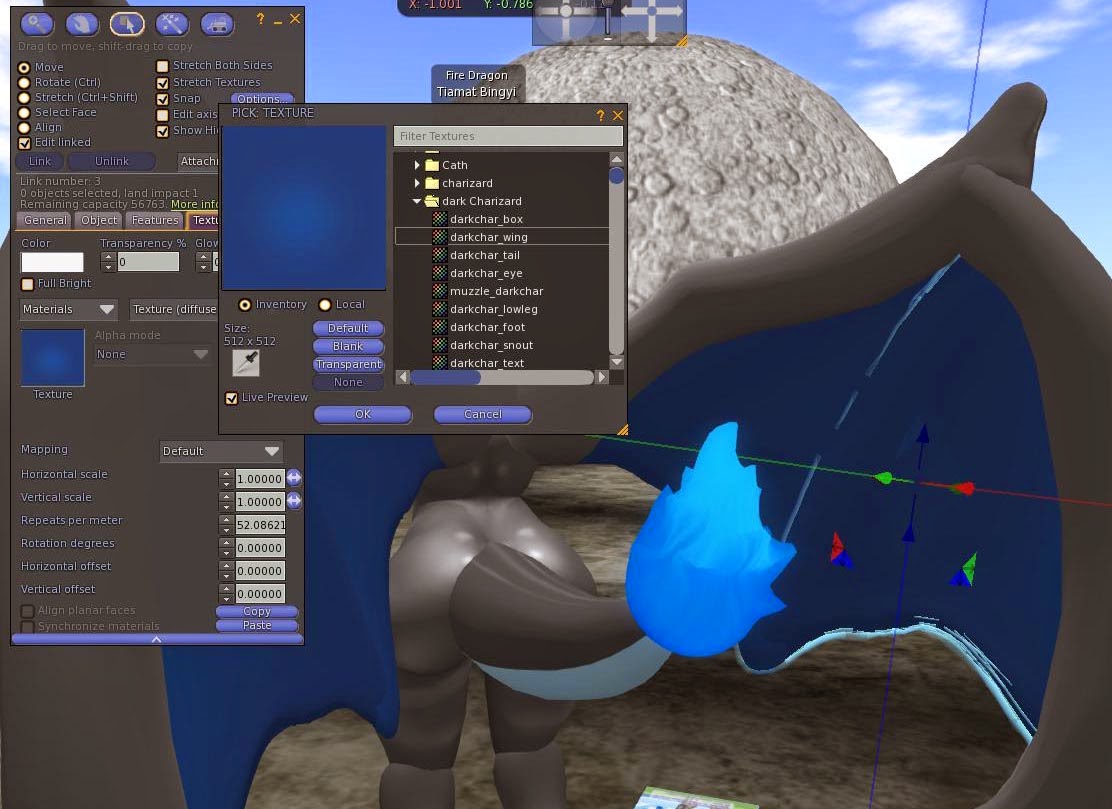
Prim tail: just change the textures. and for wing membrane, the same.
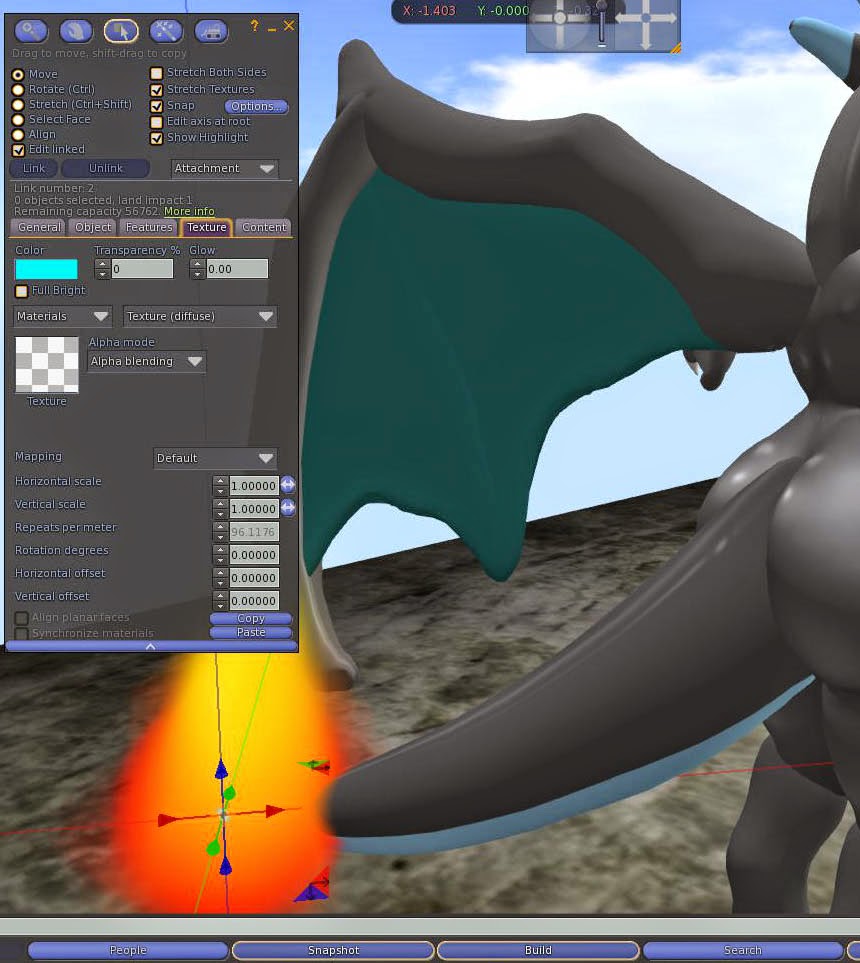
add darkchar_fire_texture

add darkchar_wing for membrane texture.
The mesh body and sculp parts have diferent shininess. you can either change everything into the same shininess from ravenoid´s body. or take shininess offfrom everything.

5. mouth flame.

wear/add it and place it.

Vista/adicione -o e coloque no lugar que melhor desejar. 

all my scripts are full perm ..if you know how you can change them.

6. Blinking head! 
Follow the guide from Charizard mod. it´s exactly the same.. the blink object is in the notecard.
drop a copy of your head, the blink object, ctrl+alt+T to see invisible prims, texturize it using darkchar_text , place and resize it to fit inside the head but covering the eyes and link them together.
, please check the guide for a better explanation.


Siga o guia do mod do charizars. é exatamente a mesma coisa. o objeto blink esta na notecard. derrube uma copia da sua cabeça, do objeto blink, use ctrl+al+T para ver texturas invisiveis e ligue tudo. Por favor olhe o guia para uma explicação melhor

domingo, 5 de outubro de 2014

Adding Blink to your Pokémon avatar head

How about giving your pokemon avatar blinking eyes?  I´ve provided the modding kit an extra simple prim with a blink script.  You have to resize, texture ( using Char_text texture) it and atatch to your avatar.

Que tal dar ao seu avatar olhos que piscam?  Coloquei junto do kit de modelagem um prim extra com um script de piscar. Você precisará redimenscionar, texturizar e anexar ao seu avatar.

(Dificult lvl: high)  - Require good knowledge in building  and editing objects in Second Life

(Nível de dificuldade : alto) - exige bons conhecimentos em construção e edição de objetos no Second Life

1.Getting ready:

drop a copy of your head and than the object i´ve put into the notecard:
Drop a copy of your head and the object blink from the modding kit notecard. Press Atrl+ALT+T to see invisible objects - the blink script is running. you can deactivate it or work using  invisible objects to place it into the correct position

Derrube no chão uma copia da sua cabeça e do objeto Blink que está dentro da notecard do kit de modelagem. Pressione Ctrl+ALt+T para ver o objeto blink invisivel.. o script está ativo e rodando, vc pode desativar o script ou apenas trabalhar vendo objetos invisiveis.

invisble objects are reddish highlighted by pressing ctrl+alt+T

2. Editing job
ohh here we go...blinking eyes
Move and resize the object to fit inside the head but also cover the eyes, because  when blinks it cover the eyes as eyelids.

Mova e redimensione o objeto para caber dentro da cabeça e cobrir os olhos, porque quando piscar cobrirá como pálpebras.


3. Linking everything
important: select first blink object and than the head.

Select first the blink object and than the head. Press ctrl+L  to put them together. Remember to follow this sequence, because the head is already set to place the correct part when you wear it. 

Selecione primeiro o objeto Blink e depois a cabeça, pressione Ctrl+L para linkar as partes. Lembre-se de seguir esta sequencia porque a cabeça ja está configurada para anexar à posição correta quando você a vestir.

4. Wear it and Voilá! :D
take the copy and wear it! wait a few moments to start blinking!!!


Take the head back and wear it. Wait a few moments to see it blinks. Enjoy!

Pegue a cabeça de volta e a vista, Espere alguns momentos para vê-la piscar . Divirita-se 

sábado, 4 de outubro de 2014

How to mod your Charizard

This tutorial is for residents who have some knowledge in editing objects in Second Life.
Este tutorial é para residentes que possuem algum conhecimento em edição de objetos no Second Life.

1. (Dificult lvl - medium)
Buying Ravenoid´s chubby mesh body and Carolzilla´s Charizard avatar! :D 
First: after buying Ravenoid´s body (https://marketplace.secondlife.com/p/ravenoid-Nohemis-Small-Chubby-Body-341/4919177   or  https://marketplace.secondlife.com/p/ravenoid-Nohemis-Big-Chubby-Body-342/4977807) and  Carolzilla´s Charizard 2.0 ( https://marketplace.secondlife.com/p/Charizard-Avatar-20/1141740) and Tiamat´s Charizard Mod kit (##)  open boxes and save them into your inventory

Primeiro: Depois de comprar o corpo chubby de Ravenoid (https://marketplace.secondlife.com/p/ravenoid-Nohemis-Small-Chubby-Body-341/4919177   ou  https://marketplace.secondlife.com/p/ravenoid-Nohemis-Big-Chubby-Body-342/4977807) e o Charizard de Carolzilla( https://marketplace.secondlife.com/p/Charizard-Avatar-20/1141740) e o kit de mod de charizard da Tiamat (##), abra a caizas e salve em seu inventário. 


2.Using ravenoid´s Small body for this guide:
This is the small chubby body, but it works for the big one as well. Just the rezise values change.
Wear your charizard avatar and drop a copy of your ravenoid´s mesh body (anyone. - male, female..):

Vista seu avatar de charizard e derrube uma cópia do corpo ravenoid mesh à sua escolha

3.
Apply body´s texture, and wear it.
Select the object, apply the body´s texture and wear it.

selecione o objeto, aplique a textura e o vista.

Tadah!!.. hu.. we´re not ready yet.
4. Resizing job....Values may change: this guide is just to help you with proportions. 

    Trabalho de alterar o tamanho. os valores deste guia são apenas para te ajudar com proporções.
Weeeee..Ima pokemon!!!. Textures were made to make mesh and sculp parts fit nicelly together.
First of all: select head and muzzle together.. resize them. the picture shows values for ravenoid´s small body.

Primeiro de tudo: selecione cabeça e mandibula juntos e redimensione. Os valores da imagem são para o corpo pequeno (small) de Ravenoid.

check - edit linked parts - on your editting window:
Apply the textures using edit linked parts: 
forehead/head : Charidar forehead , Snout : charizard upper muzzle , nosestrills and horns: char text ,  Muzzle: charizard muzzle , Neck: char neck text

 Aplique as texturas usando Editar partes linkadas:
cabeça/testa : Charidar forehead , focinho de cima : charizard upper muzzle , marinas e chifres: char text ,  Mandibula: charizard muzzle , Pescoço: char neck text
rotate texture in 90 degrees for better placement.
Rotate horn texture in 90 degrees for  better effect. You can use Vertical Offset if you want to place the texture shine efect in another position 

Rotacione a textura do chifre em 90 graus para um melhor efeito visual. Use o Vertical Offset para posicionar o brilho da textura onde quiser.
change vertical mapping orientation: my bad.. :X

Muzzle: change texture´s verticall mapping.it should have a small shine effect near "lips" area.

Mandíbula: mude o mapeamento vertical da textura da mandibula, Ela deve exibir um pequeno brilho na área dos "lábios".

Tail: pic shows the values used. but you´re free to change it. Works for scripted or sculpted fire tail.
Tail: Resize it, the picture shows the values i used for my own mod, but you´re free to change and/or rotate it for a better position. If you ´ve choosen the scripted tail, you might have to replace the fire particles emitter. Ctrl+Alt+T to see the invisible prim (using edit linked parts) and mode it next to tail´s end.

Cauda: Redimensione-a. a figura mostra os valores que usei para meu mod, mas você é livre para alterar os valores a seu gosto e/ou rotacioná-la. Se você escolher a cauda scriptada pressione Ctrl+Alt+T para mover (parte linkada)  para a ponta da cauda.

resize and texturize your wings and hands
Wings and hands: Resize and use Char_text to re texturize them. You may want to change the rotation (90 degrees) to get the texture shine effect. There´s no wing texture for the wing membranes, nor for nails.

Asas e mãos: redimensione e recoloque em posição adequada. Deve usar a textura Char_text para retuxturizar as partes laranjas. Não existe texture para as membras da asa nem para as unhas.


lower leg. Copy size values to get both loer legs with the same size. 
Legs and Feet: you can rezise them together, but for a better result you may work them separately... adjust the lower leg , copy its size values and paste them into the other leg. Feet you can work together. Use low_leg _char texture for lower Leg (R and L).

Pernas e pés: você pode redimensionar ambas juntas, mas para um resultado melhor vai precisar trabalhar nelas separadamente. Ajuste primeiro apenas uma das pernas, copie os valores e aplique na outra perna para que fiquem iguais. os pés podem ser trabalhados juntos, para encontrar a posição correta. Use low_leg_char para texturizar a perna.  

foot texures should have its values worked.
Feet: Start applying the foot texture: Use foot_char one. note, it´s not int he correct position, so you have to work it´s mapping values, Vertical and Horizontal to place the foot´s sole into the correct position. for toes, use Char_text texture. You can copy and paste the mapping values to the other foot.

Pés: Começe aplicando a textura do pé. Use a textura foot_char. Não está na posição correta, então você precisará trabalhar os valores de mapeamento novamente: a figura mosta valores vertical e horizontal para posicionar a sola no local correto. os dedos utilizam  char_text como textura. vc pode copiar e colar os calores para o outro pé.

after this, use char_text on toes.

 5. But.. but....Shininess!!!

     Mas...Mas... Brilho!!!

now what? they´re still not fitting perfectly!! D: Calm down lil grasshopper...
Oh yes... Ravenoid´s body has shininess!! D: But Carolzilla´s part dont. you can use either to get everything fitting nicely. Add shininess to everything, or just remove it from ravenoid´s body. How do you do that? Edit body again, texture tab:  by the texture button, you have also bumpness and shininess. by choosing it you get the values and mapping. for other parts you use a blank texture and use same ravenoid´s values. 20 and 0. check the picture below . It ´s shown, shininess texture and values as reference.

Ah sim!!!O corpo de Ravenoid tem brilho!! e as partes do charizard da Carolzilla não! Você pode usar qualquer um dos dois processos para chegar num resultado bom. adicionar todas as partes o mesmo brilho, ou então tirar o brilho do corpo mesh.  A figura abaixo mostra os valores e a textura branca para obter brilho homogeneo. 


Enjoy it. :)

Divirta-se :)


YEahhhh